Merry Christmas and Happy New Year
Merry Christmas and Happy New Year to family and friends,
As we all come to a close in 2025, embarking on 2026, we often reflect back over the past year. There are ups and downs, new adventures while old adventures are locked away for the memories. This has been a year reacquainting with old friends, meeting new ones (mostly along the camping trails), and still managing to keep a smile on my face.
This year, I packed my schedule full of camping trips and somehow never felt the pull to take my camera out — except for one trip in late December 2024, when that single image of the church pew poured straight out of my silence. At the time, my life felt like that empty pew: quiet, hollow, holding only the memories of better days.
But then came Edisto.
I showed up with a packed camera bag, a camper ready for ten days, and a simple goal: capture something that made me feel alive again. Something honest. Something that could tell a story and maybe even light a fire in someone else. That morning on the island, in the soft calm of the sunrise, I felt a peace I hadn’t touched in years. A whisper in my spirit said, “Turn around — see where you’ve been, and now look where you’re going. Your story isn’t stuck. Use what you’ve been given.”
And just like that, the silence cracked open.
The fire came back.
And I knew I wasn’t walking alone.
This year didn’t just give me new miles on the road — it gave me myself back. I’m healing. I’m waking up. And 2026 already feels like a year with purpose stamped across it. I’m stepping into it with a boldness I thought I’d lost, a peace that surprised me, and a fire that finally lights me up from the inside again.
So walk with me into this new season.
There’s more to see. More to learn. More to become.
And I’m grateful you’re part of the journey.
With love, peace, and a heart finally waking back up,
Mandy
Unbroken
Today’s sunrise, a tree, your child’s crooked smile, your loved one’s quiet laugh at something small—any one of these moments could be gone tomorrow. My last photo of John was his hand holding a spoon about to dig into a piece of cheesecake the day before he became ill. We would very seldom order dessert and I had ordered for him. He said to me - “I really am full, but that looks so good.” I have questioned myself all too many times why I didn’t at least snap a photo of us together that evening, but for me, I am usually behind a camera.
Photography isn’t just about sharp images and perfect light. It’s about honoring what’s here *right now*. The people we love. The places we pass every day without really seeing. The small details that make up our lives.
Photograph it. Treasure it. And just as important—don’t only capture it, *say it*. Tell the people you love that you love them. Not someday. Not when things “slow down.” Today.
Because the truth is, life is fragile. The photo you take today may become a memory you’re deeply grateful to have tomorrow. And the words you say today may be the ones your loved ones hold onto forever.
See it. Photograph it. Say it.
Before it’s gone.
Love His people,
Mandy
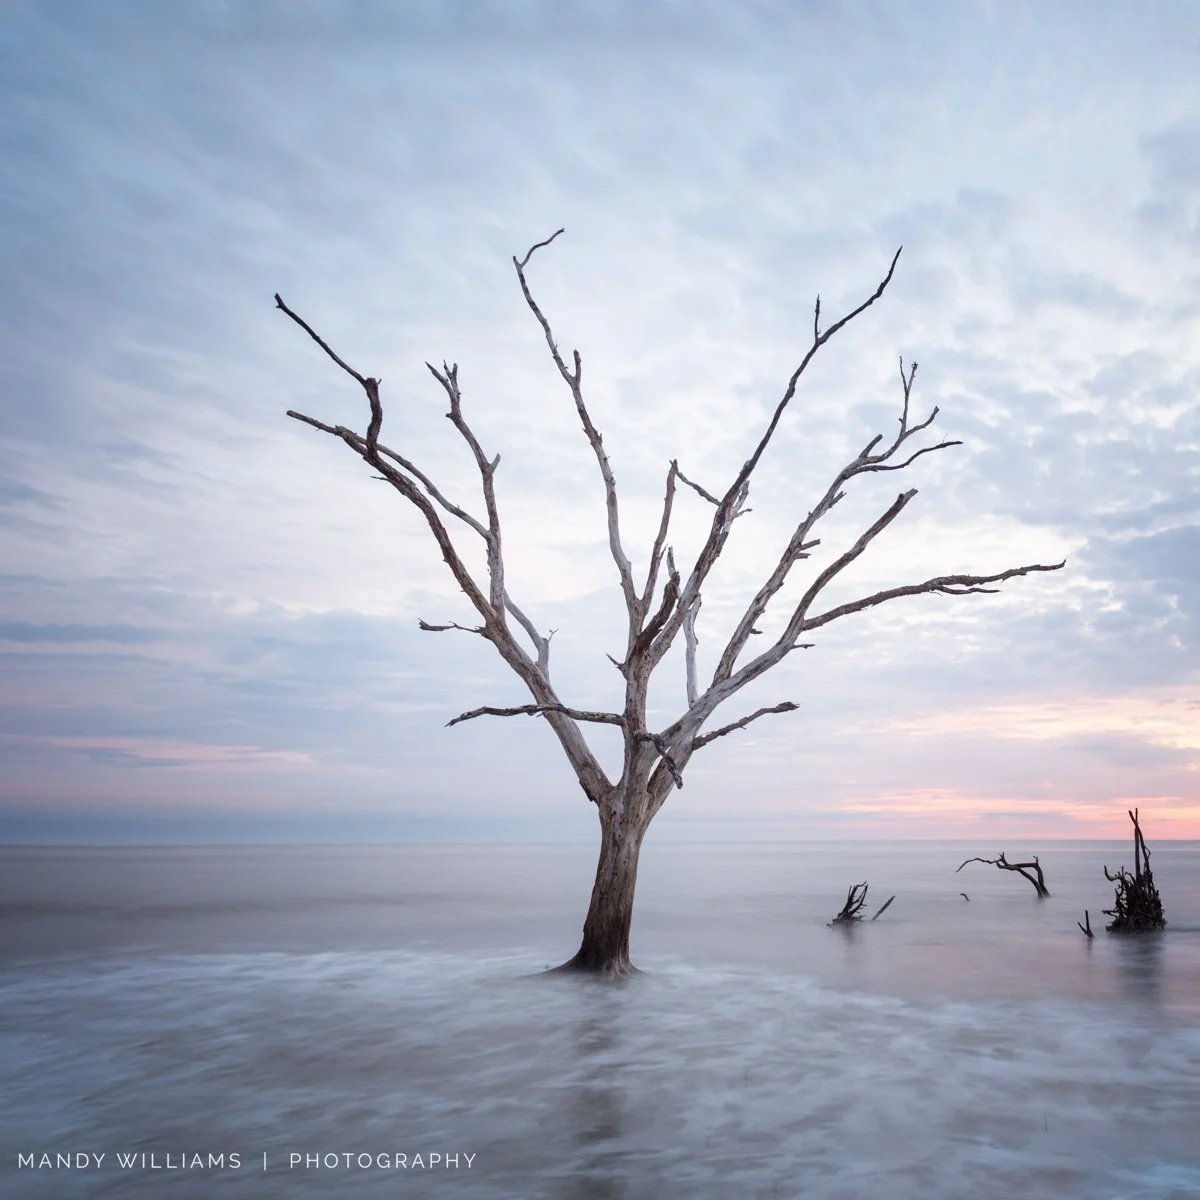
Last Sunrise
Today marks three years since John saw his last sunrise on this side of heaven. I’m sure the ones he sees now are more beautiful than anything we can imagine.
This morning, even though I was exhausted from traveling, it felt important to be on Driftwood Beach at Jekyll Island to watch the sunrise in person. I arrived late, opened my camera bag, and realized I’d forgotten my filters. For a moment I was frustrated, and then I remembered why I was really there—to honor John and capture another sunrise in the place we loved so much.
I have so many special memories of our Sunday mornings here before the Farm Bureau Convention—some years the skies were breathtaking, other years the sand gnats were brutal—but every single one of those mornings with him is something I will cherish for the rest of my life. Things looked a lot different this morning from December 4, 2022; the tide was high - the tree is not standing that we photographed together on that Sunday morning and I stood there alone. Until we see each other again, I will always love you John - save me a seat!
Into the Season
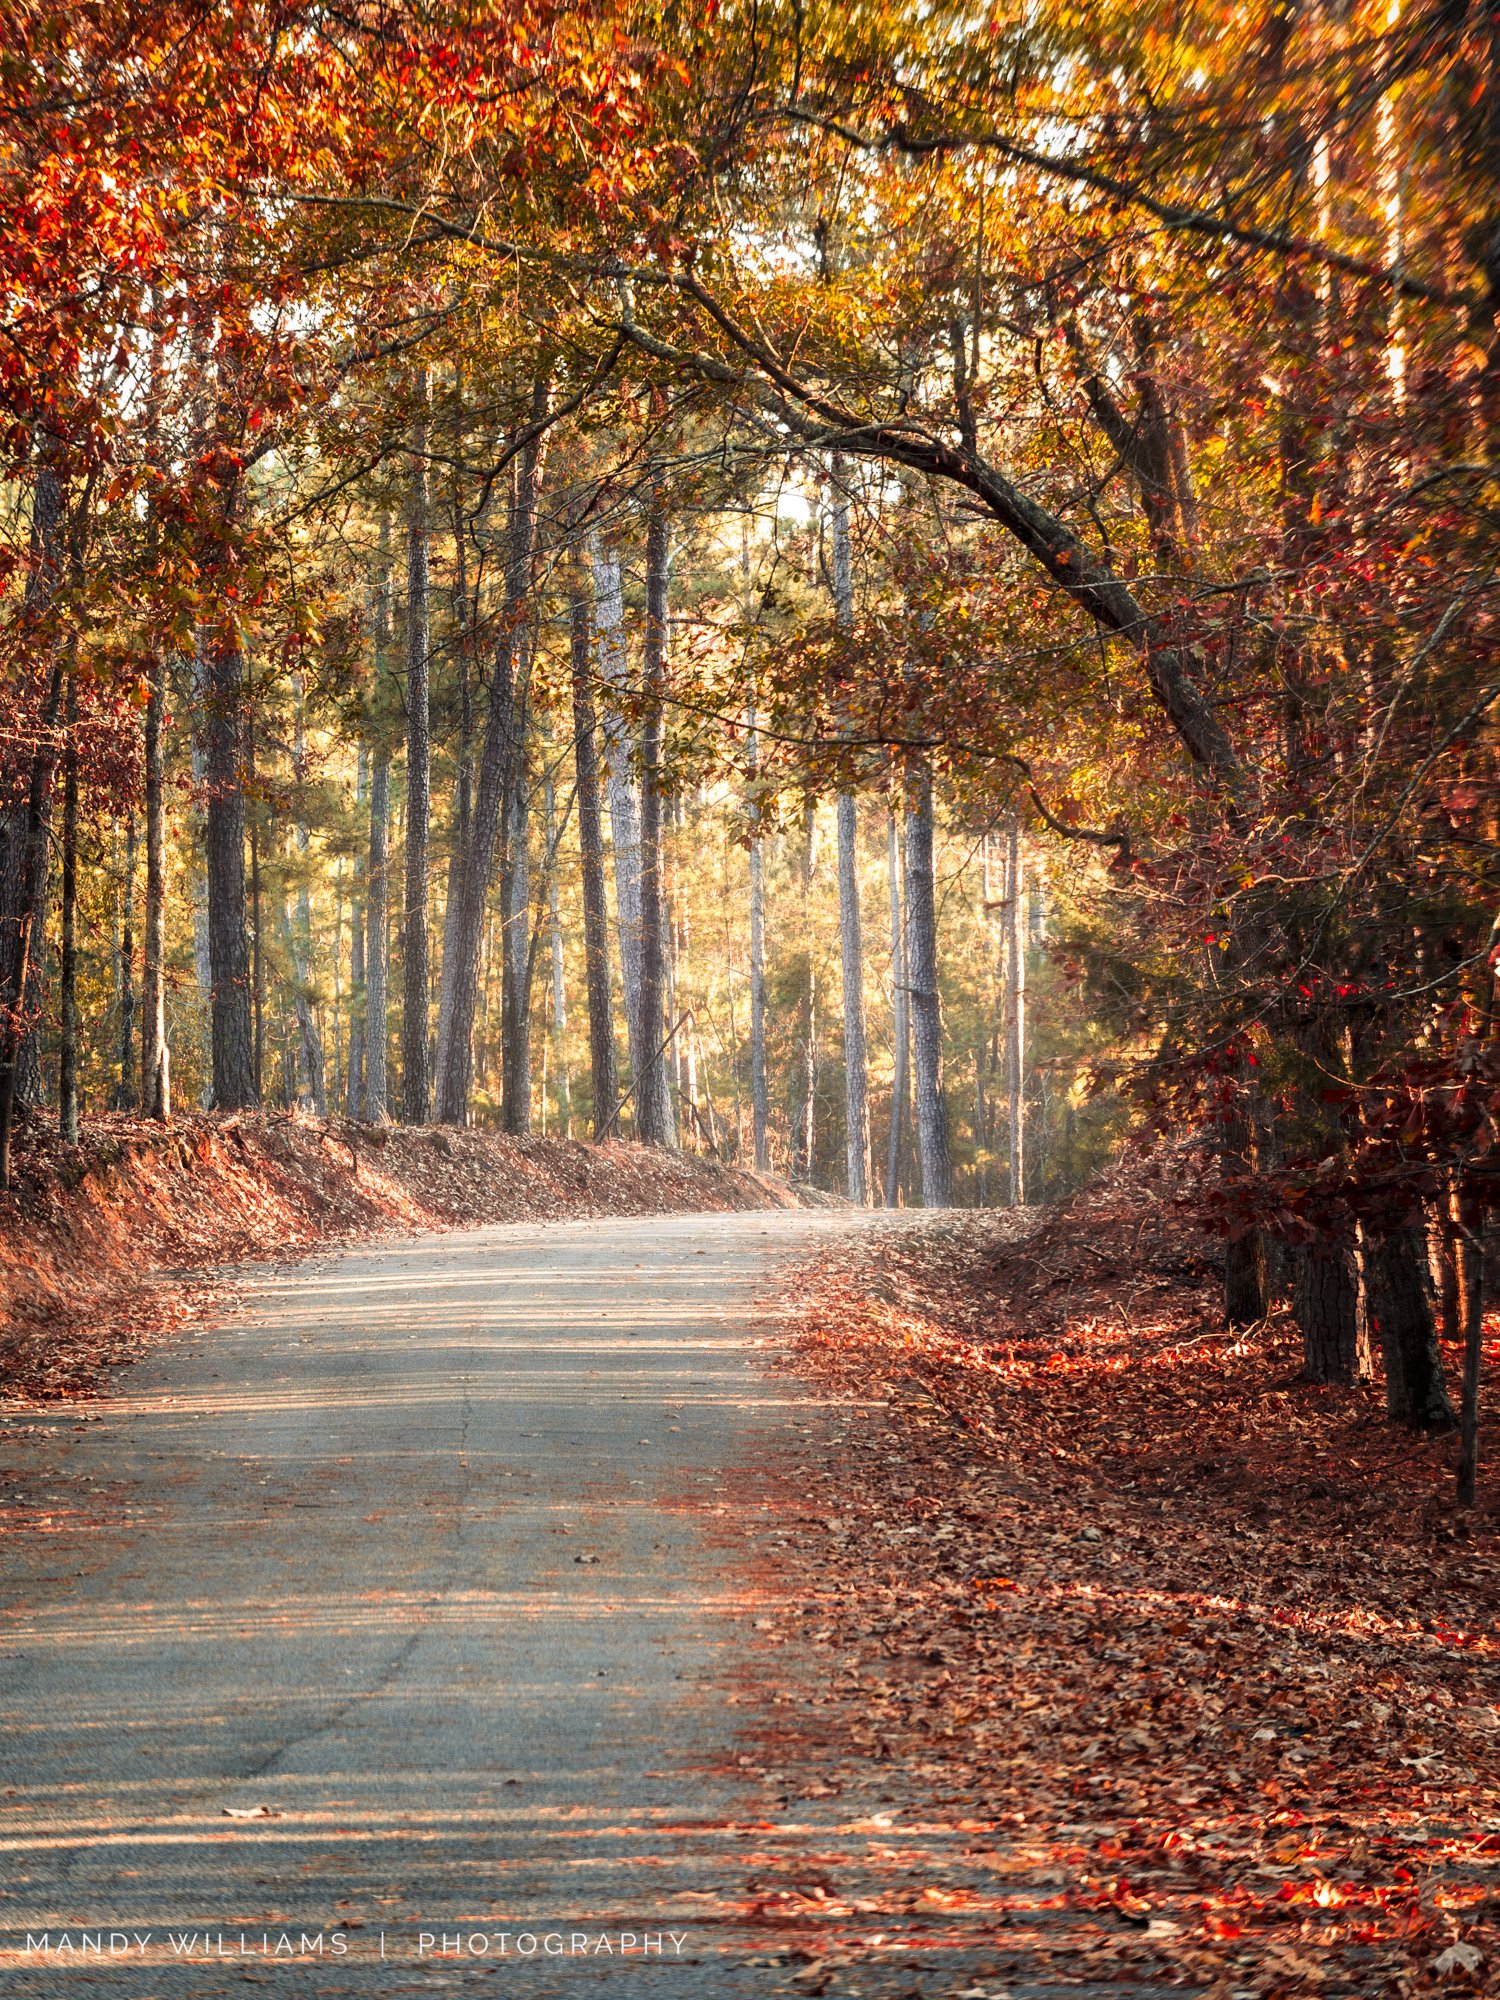
Walking down the less traveled road, you breathe in the first real smell of autumn—campfire smoke drifting from somewhere up ahead. It wraps around you, warm and familiar, like a memory from your childhood or a favorite place you visit every fall. Dogs and children play somewhere beyond the bend, their calls rising and falling in a rhythm that feels so familiar. In the woods along the road, squirrels scatter at your approach, as they prepare for the colder days to come. Leaves tumble across your path, each one a small announcement that the season is shifting, urging you to slow down for a new season. Just ahead is the first signs of the warm golden light of the sunset approaching at the end of the road. Embrace everyday and see the beauty all around you.
Seasons change and so do we,
Mandy
Elijah Clark - November 2025
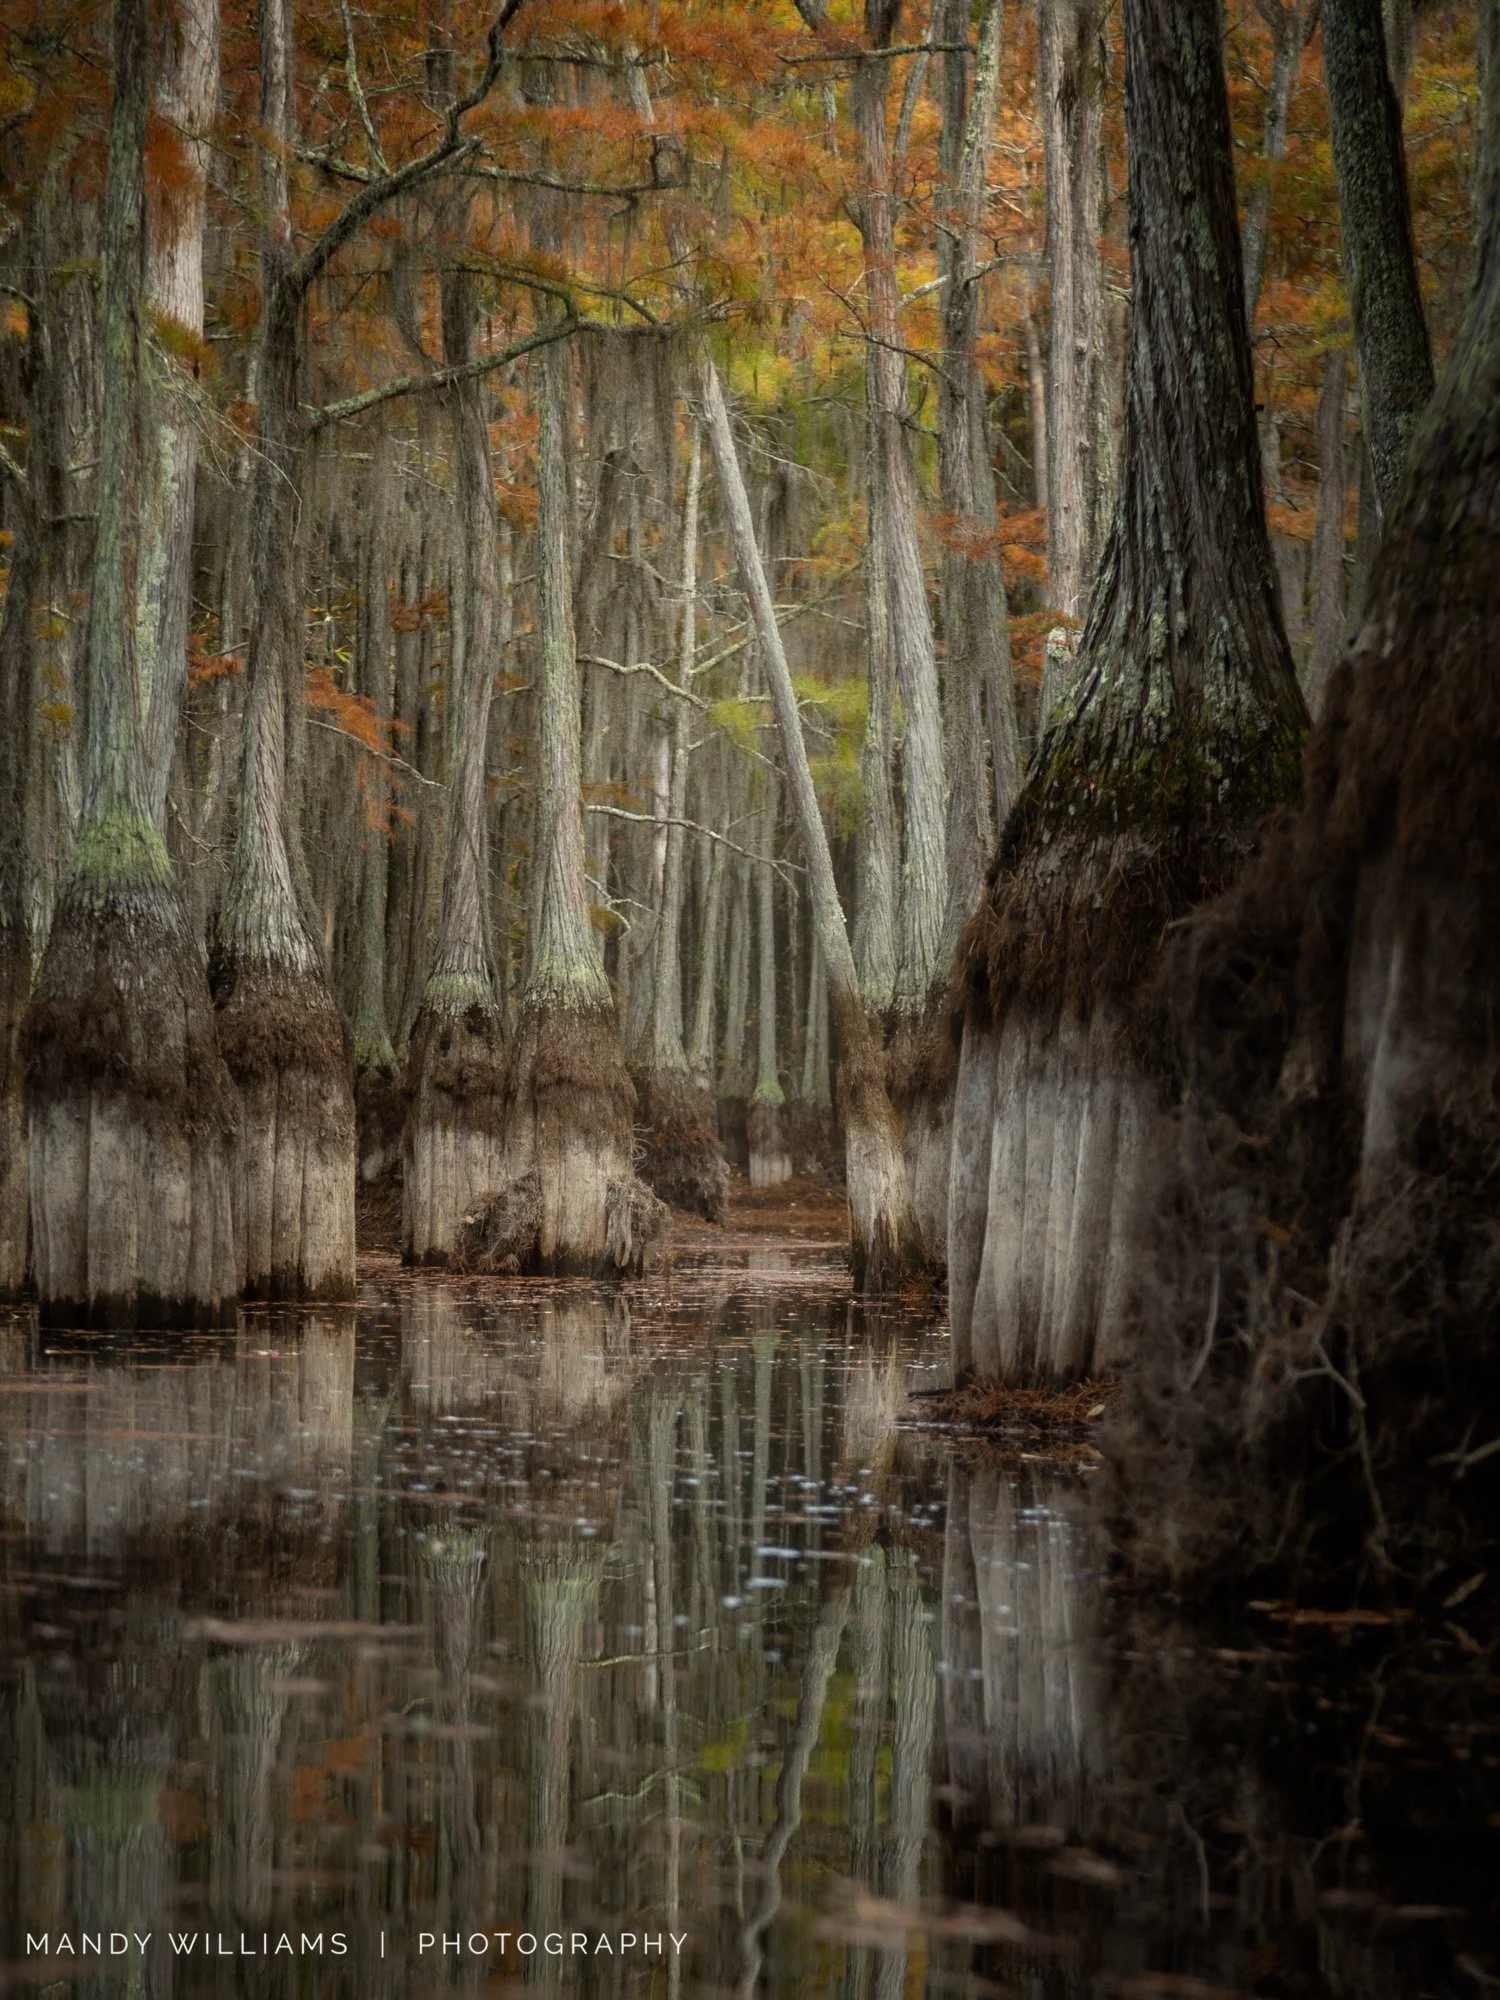
Rooted in Silence
Every one of us walks a path — some worn smooth, some so tangled we have to push our way through. Out here in the swamp, the paths twist between these old cypress trunks, narrow and uncertain, just like the turns life throws at us. You think you’re choosing one way, then you glance over and see a dozen more you never noticed.
Traveling them isn’t always easy. Sometimes it’s murky, sometimes it’s quiet enough to hear your own doubts echo. But if you’ll stand still for a moment… really stand still… you’ll feel the hush settle in. The swamp isn’t trying to impress you — it’s just showing you what’s real.
And in the middle of all that raw honesty, there’s a surprising kind of beauty waiting to bless you. Feel the silence of the swamp and let your mind drift deep in the roots of your soul.
Blessings,
Mandy